 By now, we’ve all seen Microsoft’s rebranding of Power BI, PowerApps, and Flow into the Power Platform, a set of tools for the citizen developer to analyze data, take action from that data, and, ultimately, solve problems. No doubt, you’ve seen tons of blog posts on Power BI and any number of posts on PowerApps and Flow, but have you ever put it all together. In this post, that’s what we’re going to do, and we’re going to do it with the mission of solving a single problem with a simple, minimalist approach.
What’s that problem we’re going to solve? Well, I’m glad you asked! Have you ever worked at a company that used Action Logs or been in a meeting that used them? Sure ya have. We all have! And, typically, they all stink. I mean, have you ever seen an action log and thought, “Oh, great, this’ll make things simpler!”?
Don’t get me wrong: Action logs have their place. They are useful tools that solve a significant problem. That is, how do we get things done and keep track of what is behind schedule and what needs greater attention. I have used, even built, some pretty good ones in Excel. They used conditional formatting to show what was due or behind schedule. You could filter the log by your name to find your actions or by a meeting for a group-wide review.
But, what if multiple people want to edit actions at the same time? What if someone checks out the file to edit it and forgets to check it back in? What if someone uploads an older version with his changes? And, typically, you wind up with several action logs spread across several locations. What a mess?! Power Platform (and SharePoint) to the rescue!
An Overview of the Solution (Or, if you’re Rob Collie, here’s the movie trailer)
We need somewhere to store the data. In its simplest form, an action log is a single table. Yes, you can have lots of support tables and make it super complicated, but for this demo, we’re going to keep it simple. You can, of course, store that table in SQL Server or an Azure SQL database. If I were to productionalize this solution, that’s what I would do, but SharePoint lists are a fine, simple way to store online a single table of data. Your organization may not allow you to spin up a SQL database, or maybe that’s not in your bailiwick. No worries! SharePoint lists will suffice.
From there, we’ll create a PowerApp to pull data from and push data to that list. We’ll then embed that app in a Power BI report so that management can see, at a high level, how teams or individuals are doing at accomplishing their tasks. Finally, we’ll add a button attached to a Flow to send email reminders for past-due actions.
You see, no more version control problems! Everyone can edit at the same time, and you have all your actions in one place.
First, the Data (Or, to continue the movie theme, Act I: The Setup)
As I have mentioned, the action log is a single table of data. Mine has eight columns: Meeting (in which the action was taken), Recorded Date (when the action was written down), Issue (high level), Action (more detailed), Status, Responsible Email (email address of the responsible person), Due Date (when the action is due to be completed), and Complete (a Boolean). Since we will be using Due Date for some conditional formatting, I would encourage you to use your data for this project. If you read this post a month or a year from now, that logic would not give you the results you might expect. Furthermore, an action log is supposed to be a dynamic, living document. So, use your data, and you’ll already be on your way to solving the problems that you face.
Now, On to the PowerApp (Or, Let’s Meet Our Protagonist)
The first thing we’re going to do is build our PowerApp. If you’re using SharePoint 365, it’s as simple as clicking the PowerApps dropdown and selecting Create an app.
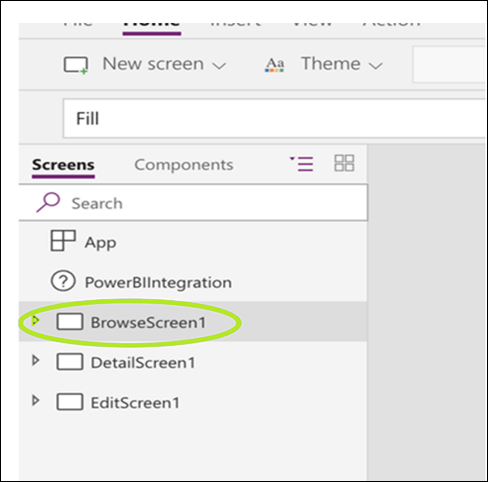
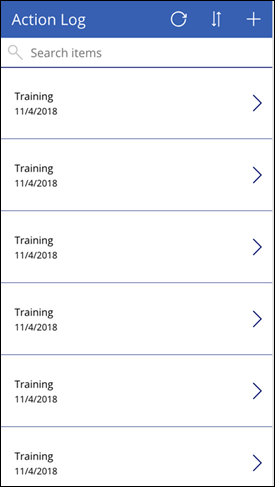
SharePoint communicates with the PowerApps service, the logo spins for a few minutes, and you get an out-of-the-box app. It follows the three-screen setup: one screen shows the list with some of the fields…
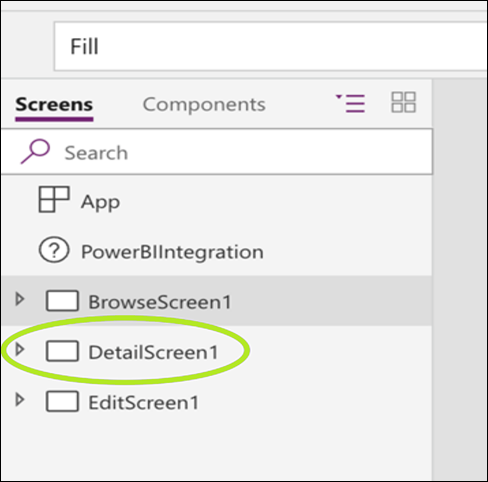
A second screen shows the details of a single entry in that list…
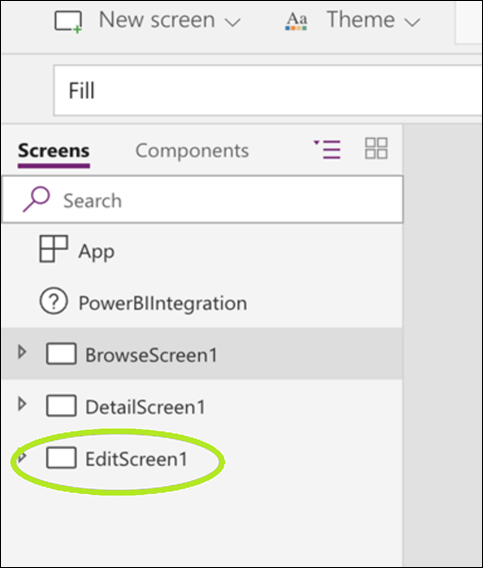
A third screen allows you to edit those details or create a new list entry.
(If you do not have access to this “create-an-app” functionality, you can still build the app manually. Because this post is long enough already and since there is plenty of material about that, I am assuming you do have that functionality and am jumping off from that starting point.)
By now, we’re off to a great start, but there are a few things I want to customize. Here’s what the app looks like so far.
First, I want to modify the Items property of the Browse Gallery (called BrowseGallery1 in my setup) on BrowseScreen1. We’ll use the following code:
SortByColumns(Filter(‘Action Log’, TextSearchBox1.Text in Action, !Complete), “Due_x0020_Date”, If(SortDescending1, Descending, Ascending))
This formula filters the SharePoint list called ‘Action Log’ by two Boolean parameters. First, it looks for the text in the search box toward the top of the screen (called TextSearchBox1) in the Action column of the Action Log table; it returns only those records where it finds the search value in the Action column. Second, it only returns rows where the value in the Complete column is false (or !Complete). The formula then sorts the resultant table by the Due Date column (here expressed as “Due_x0020_Date” since PowerApps does not like spaces) and sorts it either ascending or descending based on what is in the variable SortDescending1. There is a button at the top of the screen to toggle this variable and, thus, the sort behavior.
Quick note: If you click the down arrow on the right side of the formula bar, you will see a button called “Format text”. Be sure to utilize this feature, whenever you have any code of any complexity. Also, you can expand the formula bar by hovering over the bottom of it and dragging it down.
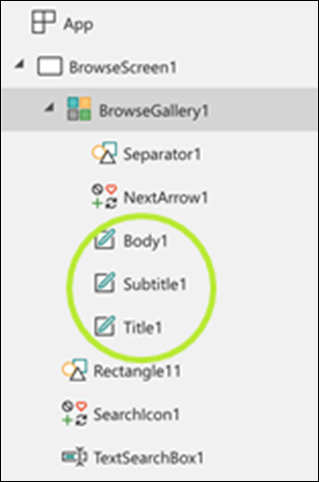
When building our PowerApp, the system gave us a vertical gallery with three elements called Title1, Subtitle1, and Body1.
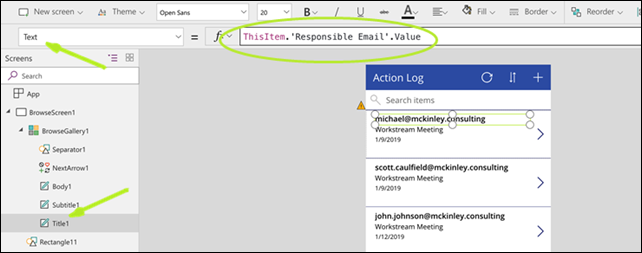
While the PowerApps software made its best guess at what fields we would want in each of these slots, we can make improvements. Expand BrowseGallery1, select Title1, and access the Text property. Change it to
ThisItem.’Responsible Email’.Value
ThisItem refers to the selected object (in this case, BrowseGallery1) and the data to which it is connected, the result set of the earlier formula. That formula returns a table of data, so ThisItem.’Responsible Email’ is the intersection of the Responsible Email column from that table and whatever record the gallery row is on. That intersection refers to a single cell. “.Value” returns the text of that cell. Notice how, when you hit enter after editing the formula, the selected card changed, in my case, from blank to an email address.
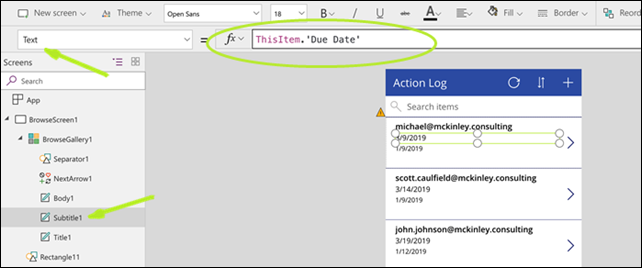
Next, select Subtitle1, access the Text property, and change it to
ThisItem.’Due Date’
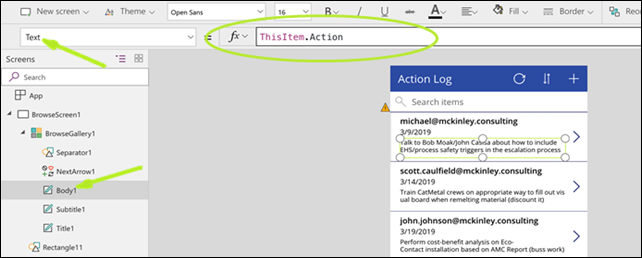
Finally, select Body1 and change the Text property to
ThisItem.Action
Let’s Add Some Conditional Formatting
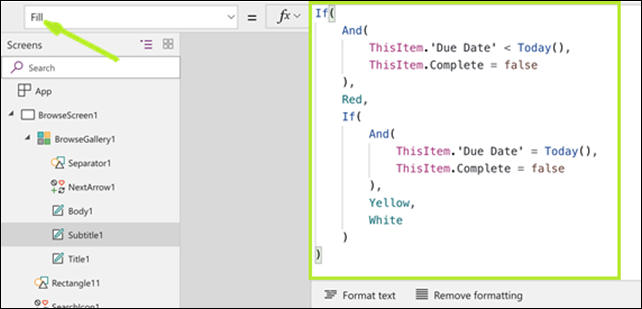
We want the date value to turn yellow for any incomplete action due today and red for any incomplete action due earlier than today. In Excel, we would call this conditional formatting. Within PowerApps, we are just controlling a fill color property by a script rather than a simple color. Select Subtitle1 (which we set to Due Date) and access the Fill property. Change it to
If(And(ThisItem.’Due Date’ < Today(), ThisItem.Complete = false), Red, If(And(ThisItem.’Due Date’ = Today(), ThisItem.Complete = false), Yellow, White))
DetailsScreen1 (Or, Act II)
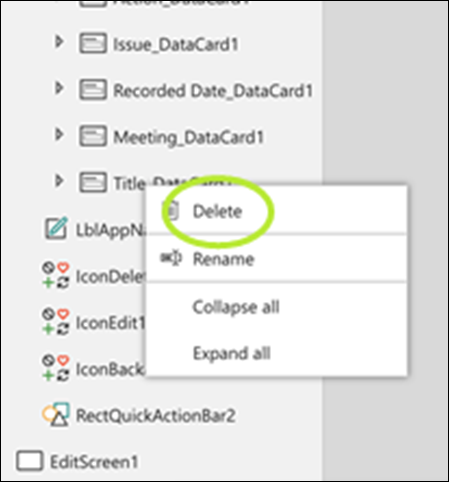
We’re now going to customize the details screen. A quick note on SharePoint lists: when you start a new list, there is a single visible column called Title and several hidden columns. On the display form DetailForm1 on the detail screen, you will find, at the top of the fields listed, a field called Title. Since I did not use this field in my SharePoint list, we will remove this card from the detail form. In the Screens section on the left, expand DetailForm1, right-click on Title_DataCard1, and select Delete.
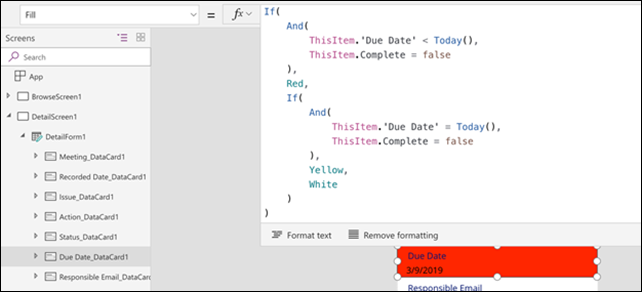
Next, select Due Date_DataCard1, which, of course, is the data card in the detail form for the Due Date column in the Action Log SharePoint list. Access the Fill property, and set the formula to
If(And(ThisItem.’Due Date’ < Today(), ThisItem.Complete = false), Red, If(And(ThisItem.’Due Date’ = Today(), ThisItem.Complete = false), Yellow, White))
This is the same formula as the one above, used for the fill color for the Due Date field for Subtitle1.
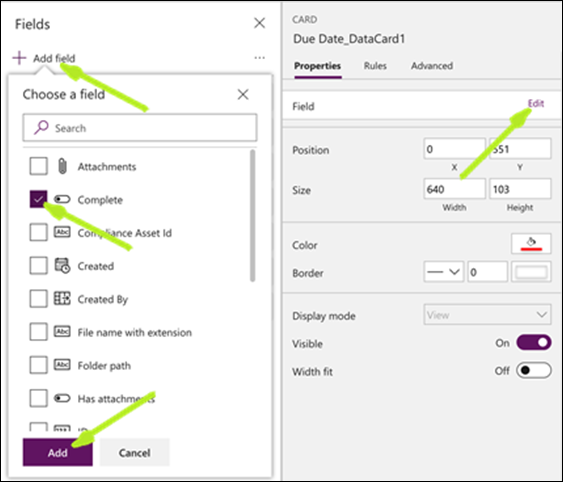
Finally, add Complete to the list of fields displayed by clicking on DetailForm1, “Edit fields” on the Properties blade. Click “Add field”, check the box next to Complete, and hit Add.
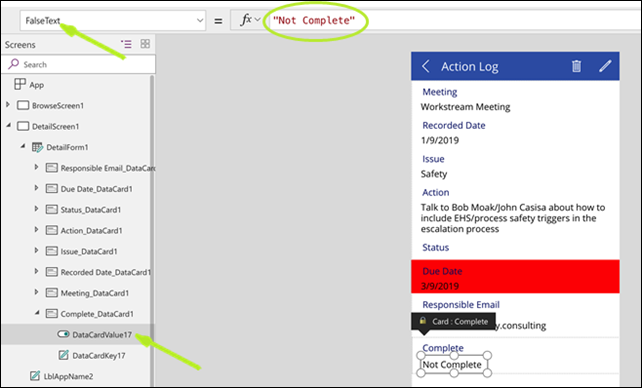
Then, expand the Complete_DataCard1, select DataCardValue1, and change the TrueText property to “Complete” and the FalseText property to “Not Complete.”
EditScreen1
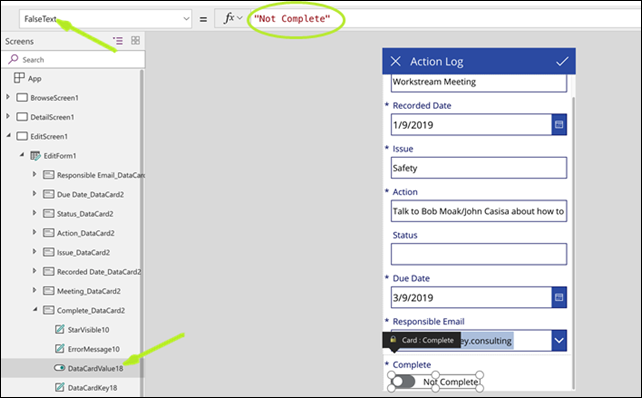
Lastly, on to the final screen, EditScreen1. Again, delete the Title data card and add the Complete data card just as you did before. Expand EditForm1 and the data card for the Complete field, select DataCardValue9 (yours may have a different number), and change the TrueText property to “Complete” and the FalseText property to “Not Complete.”
Intermission
OK. That was a lot of information. Stay tuned for Part 2 next week where we will add a flow and finish this PowerApp!
Where It’s At: The Intersection of Biz, Human, and Tech*
We “give away” business-value-creating and escape-the-box-inspiring content like this article in part to show you that we’re not your average “tools” consulting firm. We’re sharp on the toolset for sure, but also on what makes businesses AND human beings “go.”
In three days’ time imagine what we can do for your bottom line. You should seriously consider finding out 🙂
* – unless, of course, you have two turntables and a microphone. We hear a lot of things are also located there.

